Canning cherries at home is easy to do—a small batch can be finished in about an hour or two. The reward comes in both saving money (buying fresh cherries on sale is cheaper than buying canned cherries on sale) and in having delicious, healthy fruit to eat during the winter months. Here’s my tips and instructions for canning cherries.
1. Buy the cherries
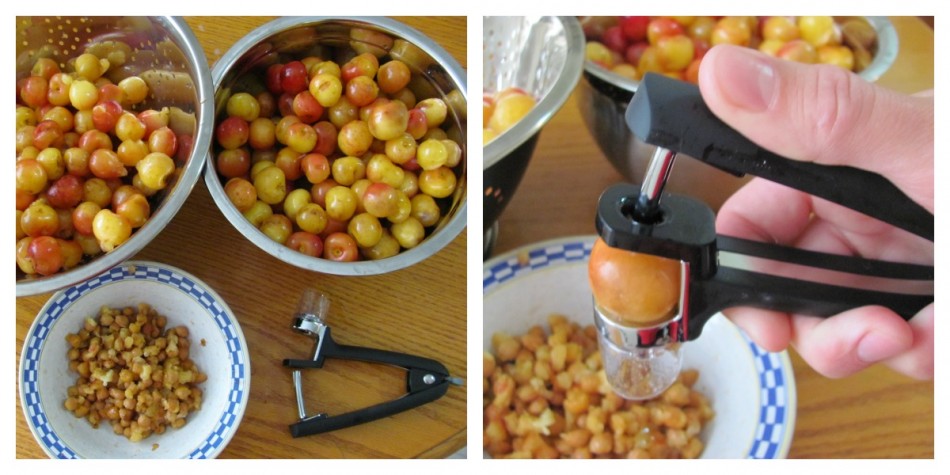
Watch for cherries on sale in your favourite grocery store or in roadside stands. Cherries usually come into season in July or August. Look for bright cherries without spots or bruises. They should be ripe but not mushy. If they taste good, they are ready to be canned. (Pictures show Ranier cherries, which I found on sale and aren’t as sweet as regular cherries.)

2. Sanitize your jars
Place your jars in the dishwasher and run on a regular or sanitize cycle. Leave the jars in the hot dishwasher when the cycle ends, until you are ready to use them. If you don’t have a dishwasher, then wash your jars in hot, soapy water and boil in a large pot for 10 minutes. Leave the jars in the hot water until you are ready to use.
What size jars you use depends on your family; my mom canned cherries in 1 litre jars for our family of five, while I canned my cherries in 500 ml jars (which also don’t require such a large pot for processing—see step 8).

3. Wash, stem, and pit the cherries
Wash your cherries in cold water. Remove the stems. Pit the cherries. (Cherry pitters are available at most department stores for $10-15 and make this process very easy. Pitting the cherries makes them nicer to eat after they are canned.) If you don’t pit the cherries, poke them with a fork or knife to prevent splitting during canning.
If you have children, this is a good time to get them involved. Toddlers or preschoolers can help wash and stem the cherries. School-age children may be able to hold and use the cherry pitter. Expect fruit to get eaten during this process. (I have fond memories of helping my mom can cherries as a child, which is part of what inspired me to start canning again as an adult.)
4. Prepare the syrup
Cherries are canned in a light sugar syrup, which helps the fruit keep its colour, shape and flavour. Boil 7 cups water with 1 cup sugar (in a large pot) until the sugar is dissolved. If you don’t want to use sugar, simply can the cherries in water or use honey or Splenda to make a light syrup. Cherries can also be canned in fruit juice such as apple or pineapple.
5. Sanitize the lids
While the syrup is heating, place the lids in a pot of water and bring to a boil. Keep boiling for five minutes to sanitize. Leave in hot water until ready to use. To remove jars from the hot water, use a set of metal salad tongs or get a magnetic lid lifter.
6. Place the cherries in the syrup
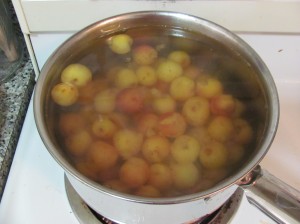
Place the cherries in the hot syrup and boil for five minutes. Fill your canning pot half-full with water and start it boiling to prepare for step 8.

7. Place cherries in jars
Use a slotted spoon or ladle to spoon the cherries into the jars. A large-mouth funnel can help with this process. Pour syrup over the cherries to cover, leaving a half inch of space at the top of the jars. Run a knife around the sides of every jar to remove air bubbles from the jars. Wipe the rims of the jars and place the lids on the jars, screwing the lids down tightly.
8. Process the jars
Place the jars in the large canning pot. If necessary, add more water so that the jars are covered. The pot should be large enough that the water is as deep as the jars or completely covers the jars. Keep the water boiling for 20 minutes to process the cherries.
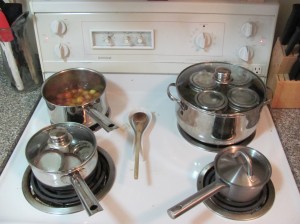
Use a jar lifter to remove the jars from the pot and place them on a hot pad or tea towel to cool. (Picture: first batch of jars processing large pot on the right; more cherries waiting in syrup to be placed in jars; lids staying hot in pot; and lunch cooking in the smallest pot.)

9. Check jars for seal
When the jars have cooled, check to make sure that they have sealed. All the lids should be down (you may hear them popping as they cool to indicate that they have sealed). If any jars have not sealed, or if the lid pops down when you tap on it, you’ll have to eat those jars soon (place them in the fridge). Do not reprocess jars that haven’t sealed.
Label your jars with the date and store in a cool, dry place.

Fancy Cherries
For a special variation on cherries, add 1-2 tablespoons of brandy or rum to the bottom of the jars. Pour in some syrup, then add your cherries and cover with more syrup. Place lids on tightly and process as before.


you make all this look so easy. If only I had the time to do it all…
Julie, I used to think it took lots of time too (my mom would spend all day canning), but it actually doesn’t. I’ve done a batch of jam in about 40 minutes (four jars) and these cherries took me less than 2 hours (including waiting for my dishwasher to finish its cycle so that I could get the jars out). And part of that is just waiting for the cherries to cook or process, so you can do other things at the same time.
Oh, I need to get a cherry pitter! That looks cool.