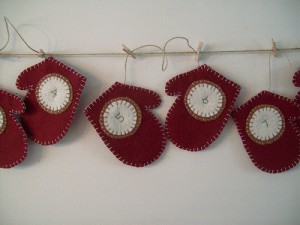
This year Rowan will be a few months shy of three at Christmas, and she’s old enough now that it seems important to make Christmas really special. One project I’ve been pondering for years is making my own Advent calendar. So I hopped online for ideas, found the gorgeous Flickr pool of handmade Advent treasures, got good and inspired… and then my sewing machine promptly died. Oh well.
There’s a bewildering array of home-sewn Advent calendars out there in all shapes and sizes, but I’m going to just provide a quick how-to for some of the more basic shapes.
Making an Advent Calendar with Strips of Pockets
 This is probably one of the easiest kinds to sew. You’ll need a large piece of backing fabric to which you’ll sew wide strips of fabric along their bottom edges. Then simply stitch up the strip as many times as you need to create the pocket divisions. It’s basically the same technique you use to make a door-hanging shoe holder, or (on a smaller scale) a crayon roll – the latter, by the way, make excellent stocking stuffers. You can vary the technique by cutting the upper edge of each strip in a wavy pattern and finishing the edge with bias tape – this allows you to make some pockets taller than others.
Change up the pattern by making a long, thin calender or a single wide row of pockets. Use Christmas fabrics, linen and plaids for a rustic look, old jeans or whatever you want! You can embroider, stencil or applique the numbers to each pocket – or, if that seems too labor-intensive, find some numbered buttons or tags and sew them on. You can shape the backing fabric into a star, house, Christmas tree or simple rectangle.
Using Old Pockets to Make an Advent Calendar
If you prefer individual pockets, try cheating and using ready-made ones. Patch pockets from old jeans or men’s shirts can be embroidered or embellished before topstitching them onto the backing fabric. If you’d rather make your own pockets, try my patch pocket with contrast strip tutorial to give the pockets a pretty edging in Christmas fabric.
Sewing a 3-D Advent Calendar
If you can cover backing fabric with pockets, you can cover a stuffed object too! Find a tutorial online to make a 3-D shape such as a ball, wreath or Christmas tree, and pop patch pockets all over each segment before sewing and stuffing the pieces. You could even shape the pockets like balls, stars or other Christmas tree decorations.
Making a “Clothesline” Advent Calendar
These are cute! The basic idea to is to string up 24 individual bags, pouches, pockets or mini-stockings across a “clothesline”. This looks particularly cute when strung across a mantelpiece with lots of greenery. There’s a huge variety of available shapes to sew, from simple drawstring bags to origami-style boxes, envelopes or cones. A lined, finished square of fabric can be used just like a sheet of paper for origami shapes – just tack down the folds with a few stitches. Knitted, crocheted and paper versions of the clothesline idea are also cute, depending on how much time you have!
Making a Lift-the-Flap Advent Calendar
 If your Advent calendar contains slips of paper detailing Advent activities or Bible verses, you don’t need big pockets. Sew squares of felt or finished fabric along one side only to the backing fabric, and you’ll have flaps or doors the kids can open to reveal the message pinned underneath. It might be wise to secure the flaps shut with press-studs, buttons or Velcro to prevent peeking. Try making the flaps different shapes and sizes, or decorate them like windows and doors to make a crazy Advent house.
I haven’t decided yet what kind of Advent calendar I’ll make, so feel free to leave some more creative ideas in the comments section!
Photos courtesy of Jennifer from Look Happy.


Wow, those look really great! I wish I knew how to sew…perhaps my mom will help me 🙂