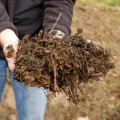
Soil composition can be improved with additions, called amendments, that add nutrients and beneficial organisms to the soil. These amendments can help change the soil pH as well, so let’s explore all of these options individually so you can create the best soil for the plants you want.
Why pH Matters
The level of something’s acidity or alkalinity is called its pH level. Soil has a pH level too and it changes region by region or even from one garden area to another. The scale runs from 0-12, and a perfectly balanced substance will have a pH level of 7. Anything below 7 is increasingly acidic the lower the number falls, and above 7 becomes increasingly alkaline. You can get test strips from your local nursery or extension office to see where your garden’s soil falls.
Different plants need different levels of acidity. To amend the soil in a specific area, you can add organic matter that is either acidic or alkaline along with the mulch or compost that you include around that plant.You can’t just pile it on, though – typically the amendments do best mixed into the soil well. Please don’t use these lightly – be certain of your pH via testing, and then apply amendments only as required.
And don’t spread your plants of one kind around the garden. For example don’t place acidic loving plants next to plants that prefer more alkaline soil. Sometimes what you find is that most plants tolerate a fairly neutral level but certain plants truly do best in one kind of soil or the other kind of soil. You will want to group these plants together. For example you want all your acid loving plants in the same garden design so you only have to amend one section of your garden.
Acidifying soil.
If you have more alkaline soil but are growing plants that need some acidity, you’ll want to amend the soil with acidic organic substances such as Elemental Sulphur. Add it carefully to the soil – you have to really mix it thoroughly because it needs to contact the soil (namely the bacteria in the soil) to drop the pH level as needed. Follow the label directions carefully.
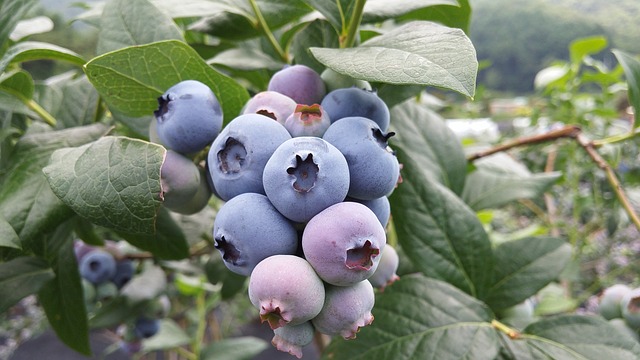
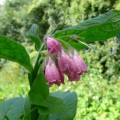
Blueberries prefer acidic soil so plan accordingly. If you can’t amend your soil, try growing them in containers.
Nitrogen fertilizers can be excellent for acidification, as is sphagnum peat moss, though there are sustainability concerns for its harvesting methods. Pine needles have long been believed to acidify the soil, but because it is the green needles that produce acid, brown needles may not be strong enough to reach the root level where the plants obtain nutrients. Without using a strong amendment, ammonia-containing fertilizers may be the best option.
Another fun way to treat acid-loving plants is to water them with a dilute coffee mixture – half and half is usually plenty. We use leftover coffee from the bottom of the pot for this. It won’t change the soil pH but it will give them water-soluble acidity.
Azaleas, laurels, Lily-of-the-valley, berries (especially blueberries), and potatoes all thrive in lower pH levels. Many of the plants in my Part-Shade Foundation Border garden design on page 41 of Gardening Like a Ninja prefer acidic soil.
Alkalizing soil.
Sometimes, the soil is already acidic, which is problematic for most plants. Water is typically going to be more alkaline or neutral, so anything that helps the soil retain water will help with alkalinity. Fireplace ashes, garden lime, crushed dried eggshells, or a sprinkling of Epsom salts can help to increase alkalinity in the soil.
For more dramatic pH level changes you might be able to try an organic amendment like dolomite lime, however be careful. If your soil has a lot of magnesium (or even normal levels) you won’t want to use the lime as an amendment. (Now do you see why I recommend connecting with your local County Extension Office to help you navigate this?)
Many leafy green plants prefer slightly alkaline soil but rarely does soil need a lot of amendments in this direction. A quick soil testing by the County Extension Office will help you figure out if your soil is in a good range or not.
Top Dressing – Adding Mulch to the Garden
One of the best things a gardener can do is to add mulch to the garden. This is a barrier that sits on top of the soil to protect the plants, minimize erosion and evaporation, and hopefully add organic matter back to the soil. In many commercial agriculture set ups you might see black or white plastics used over the soil, however I much prefer organic mulches which will FEED the soil while protecting the soil.
Straw – I love straw as mulch. I have access to hay from my FIL, so we always have the ability to scrape up leftovers from the hay bales to spread over our garden areas. Straw is usually loose enough that it won’t mat and get slimy, it allows good air flow and water permeates it easily. It is dry, however, and a brown matter on the compost chart, so if your soil is low in nitrogen straw will use up nitrogen during it’s breaking down process and could temporarily cause lower nitrogen levels. If you allow straw to partially decompose, this effect will be minimized. Straw will last one season in the garden.
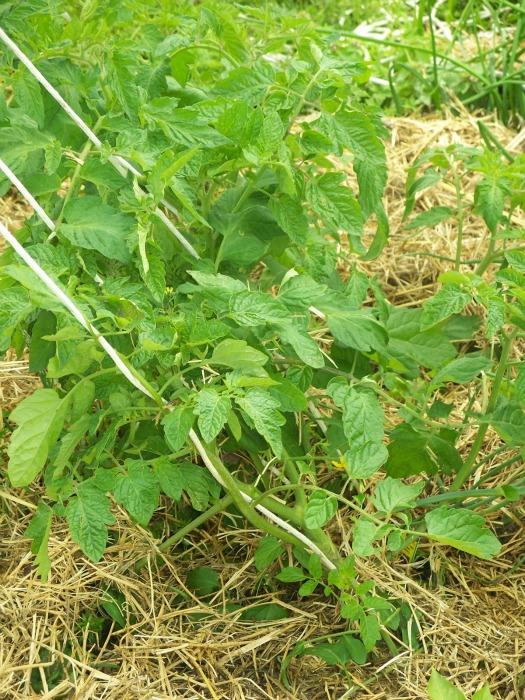
A thick layer of straw helps conserve water for these thirsty tomatoes.
Wood Chips or Bark – These can be homemade by chipping pruning leftovers and woody cuttings from garden clean up. Or you can purchase bags ready-to-use from garden centers and nurseries. Please use caution if you purchase wood chips – look for signs of termites (I’ve seen this in a friend’s purchase before!) and do not use artificially colored bark chips in an edible garden. Wood chips can last longer as they break down more slowly, however, so I prefer them in established beds and borders vs vegetable plots that turn over seasonally. I like to use wood chips around shrubs, trees, and perennials.

Bark and wood chips can be highly attractive around perennials and shrubs in the garden landscape.
Leaves – Chopped leaves are often readily available free for anyone willing to do a bit of raking. They make an excellent organic mulch and do well choking out weeds; however, they can sometimes create mats that actually repel water. You may need to rake them periodically to fluff them up and allow the water to go through the mulch to the soil underneath. Typically leaves will last just one season. In windy areas, you might find that when the leaves dry out they blow away.
Pine Needles – Similar to leaves, these are often available free for those willing to work to get them. I think they are more attractive looking than chopped leaves and last longer in my experience as well. While they can form mats, these don’t usually suppress water from reaching the soil, but double check to make sure your plants are getting the water they need. Expect pine needles to last over a year and into the next season before needing to be refreshed.
Grass Clippings – Easily and readily available, they are a green matter on the compost chart and will provide a quick boost of nitrogen to the garden space. They break down quickly, however, and when applied in a thick layer they can form a mat and get slimy. I prefer to apply them in a thin layer under other mulches or compost them first.
Seed Hulls – Cocoa, hazelnut, cottonseed, or other commercially produced crops often have their hulls and waste ground as leftover by-product. If you are able to obtain these at a reasonable price they can make a lovely ground cover and will usually last more than one year.
There are so many options out there, especially over-priced and brightly colored items, that it can be tough to decide what to use. I tend to over-simplify and go with a readily-available organic material. The key is to be able to get your hands on it, without spending an arm and a leg, and then use it. Liberally.
When you apply mulch to your garden don’t place it right against the stem of the plant. Leave space around the plant where it comes out of the ground to allow good air circulation, especially on plants prone to mildew diseases.
Assignment – Test your soil and determine your soil’s current pH levels. Keep this in mind when planning your garden designs.
Secondly, decide which mulch you can easily get and begin getting it. If you’ve already got garden spaces planted, apply a nice layer of mulch around your plants. If you don’t have your plants yet, just keep this lesson in mind and be ready to apply your mulch once you get things planted.
Continue to Unit Three: Landscape Design or see the full outline of Gardening Like a Ninja: An Edible Landscaping Guide Course.